📋 Jump to Section
DoorVi Admin
Dashboard Guide
Everything you need to manage your gated community —
resident access, pre-approvals, gate hardware & visitor monitoring.
Dashboard Overview
What you see when you log in and how to navigate
Property Management
Add and configure buildings and their units under your account
Add a New Building

Buildings & Wings

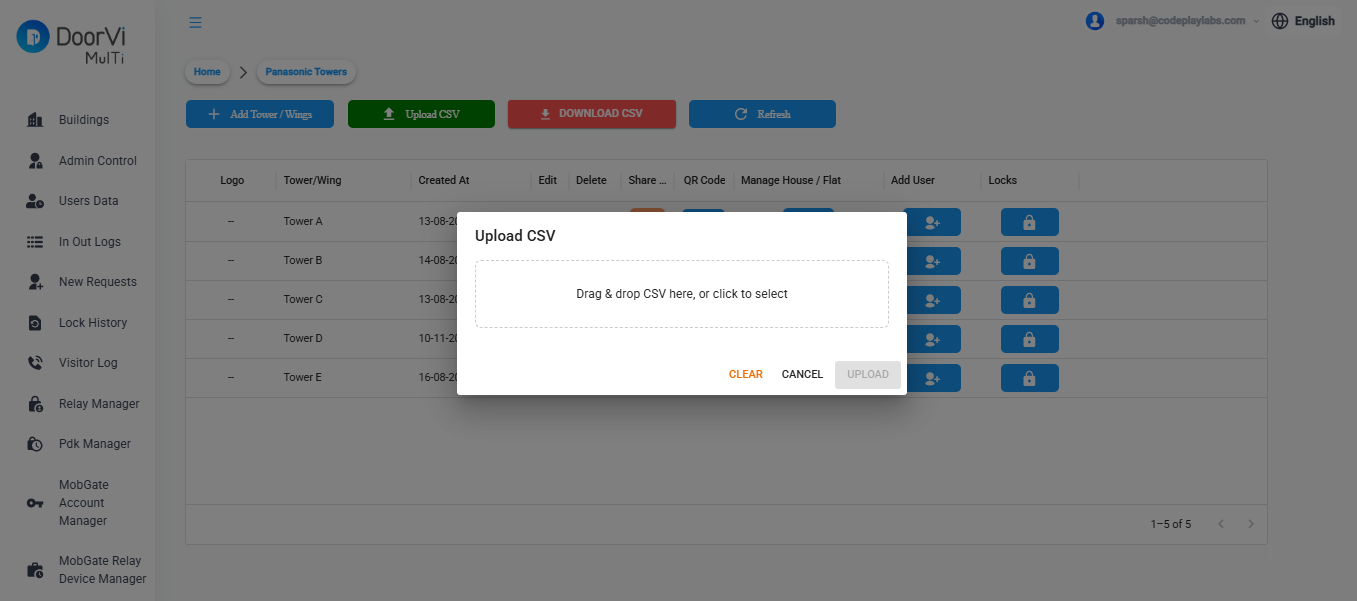
Bulk Upload Towers & Apartments
            sub_unit_1, sub_unit_2

            Tower A, A - 101

            Tower A, A - 102

            Tower B, B - 201

            Tower B, B - 202
⬇ Download sample CSV
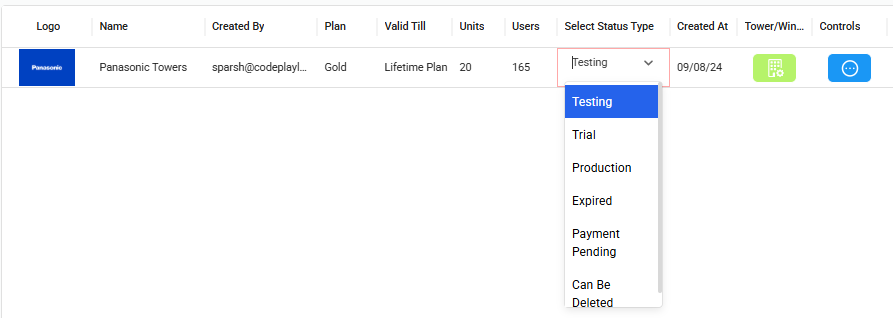
Select Building — Current Status
- Testing — Building is being set up or evaluated; not yet live for residents
- Trial — Active trial period; full features enabled for a limited time
- Production — Building is live and fully operational
- Expired — Subscription or trial has lapsed; access is restricted
- Payment Pending — Awaiting payment confirmation before reactivation
- Can Be Deleted — Marked for removal; safe to delete from the system
Share Invitation Links with Residents & Tenants
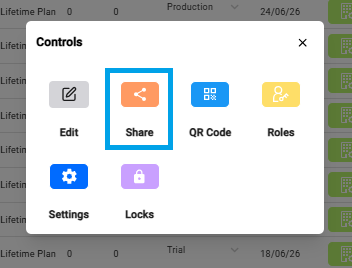
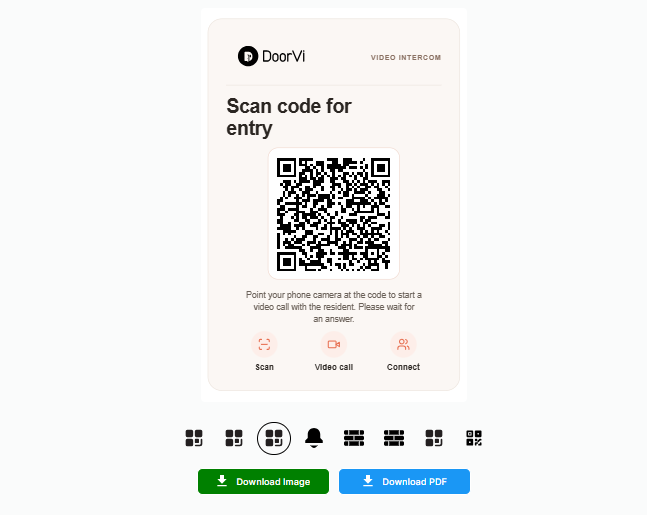
Generate QR Code
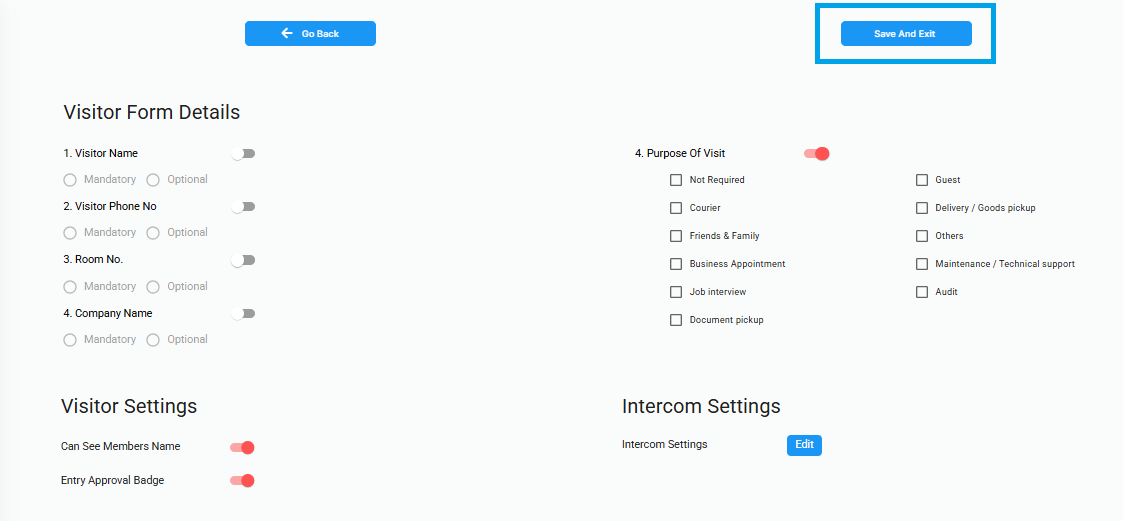
Visitor Verification Settings
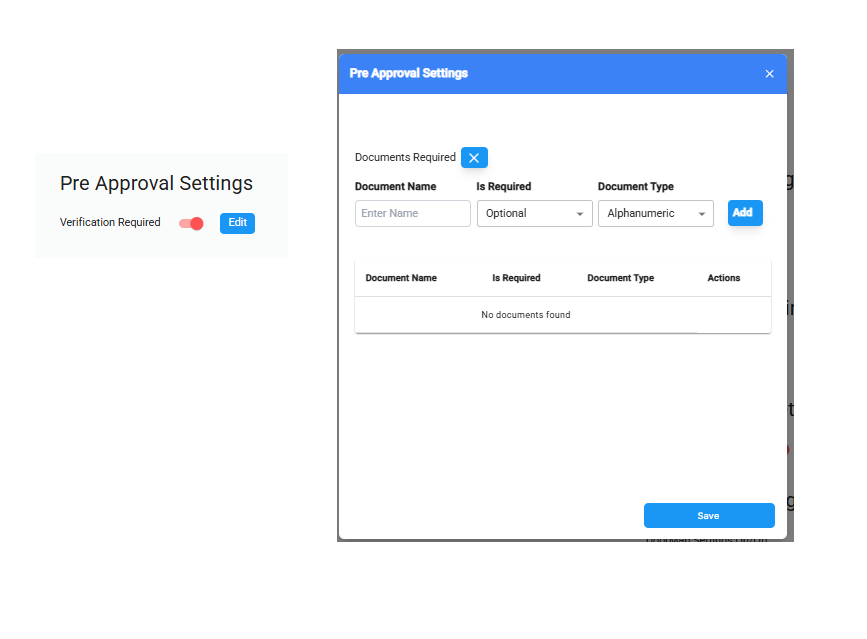
Pre-Approval Settings
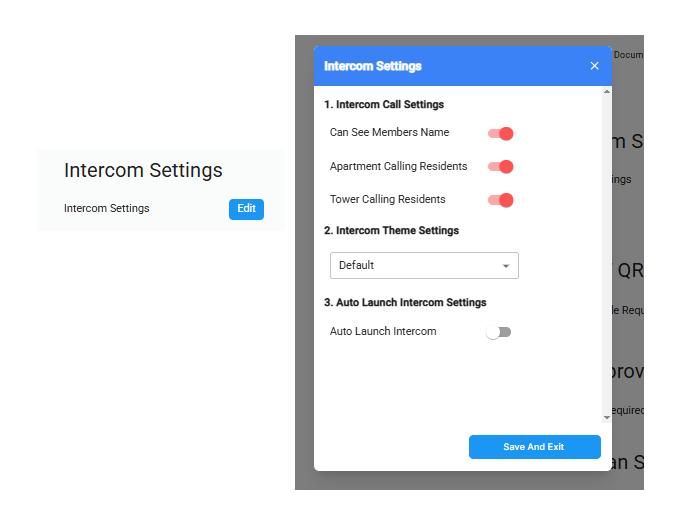
Intercom Settings
- Can See Members Name — enable this to allow residents to see name of the residents before initiating a intercom call
- Apartment Calling Residents — enable this to allow residents within the same apartment to call each other via the intercom
- Tower Calling Residents — enable this to allow residents across different towers to call each other via the intercom
- Theme — select the intercom display style from the dropdown (e.g., Dialer)
- Show Call Logs — check this to display the call history on the intercom screen
- Show Dialer Pad — check this to show a dial pad for manual number entry
- Contact List Type — choose Old Intercom for the classic layout, or Contact Details for a modern contact-based view
Resident Management
Add residents, assign units, and manage their access
Add a Resident

Bulk Import Residents
            sub_unit_1, sub_unit_2, user_name, user_email, user_phone

            Tower A, A - 101, sparsh, sparsh@doorvi.co,

            Tower A, A - 101, jatin, jatin@doorvi.co,

            Tower A, A - 102,,,

            Tower A, A - 103,,,
⬇ Download sample CSV
Approve / Reject Resident Requests Manually
Residents Directory
Visitor Logs
Complete record of every entry attempt at every gate
Viewing the Visitor Log
Pre-Approvals
Let residents create passes for expected guests before they arrive
How Pre-Approvals Work
Pass Types
| Pass Type | Valid For | Best For |
|---|---|---|
| Single-use | One entry, one day | Delivery, one-time guest |
| Multi-use (date range) | Unlimited entries in a date window | House guests staying a few days |
| Recurring | Specific days of the week | Maid, driver, cook |
| Event pass | Multiple guests, one time window | Birthday party, building event |
Check in / out - Visitor Data
Settings
Account-level configuration, language, and security
🌐 Language
Dashboard supports 11 languages: English, Hindi, Spanish, Russian, Portuguese, Japanese, Korean, Indonesian, German and Italian. Set per user account.
👥 Admin Team
Add co-admins with read-only or full-access roles. Useful for RWA committee members who need to view logs only.
🔐 Two-Factor Auth
Enable 2FA for all admin logins. Strongly recommended for accounts managing multiple buildings.
🗃️ Data & Privacy
Download all building data, or request deletion as per GDPR Compliances, DPDP Act (India) / LGPD (Brazil) compliance requirements.
🔑 API Access
Generate API keys for integrating DoorVi with your RWA management software or third-party tools.
📤 Audit Log
See every admin action taken in the dashboard — who changed what, and when. Exportable for compliance.