📋 Jump to Section
Waveshare ESP32-S3
WiFi Relay with DoorVi
Step-by-step guide to configure the Waveshare ESP32-S3 WiFi Relay Module with the DoorVi control panel — from firmware flashing to adding a lock.
Prerequisites — Hardware Setup
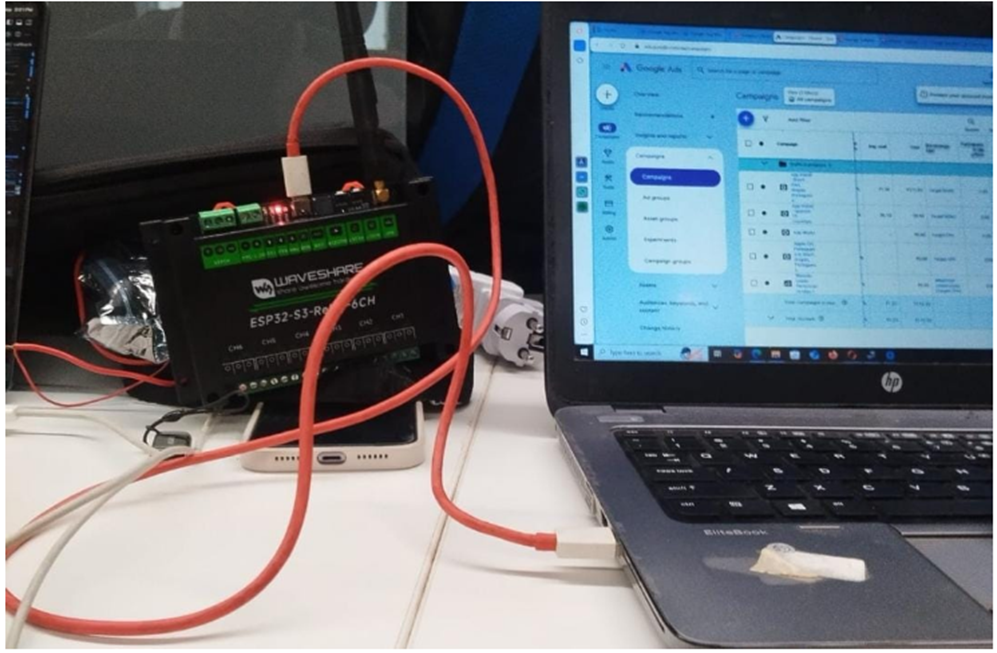
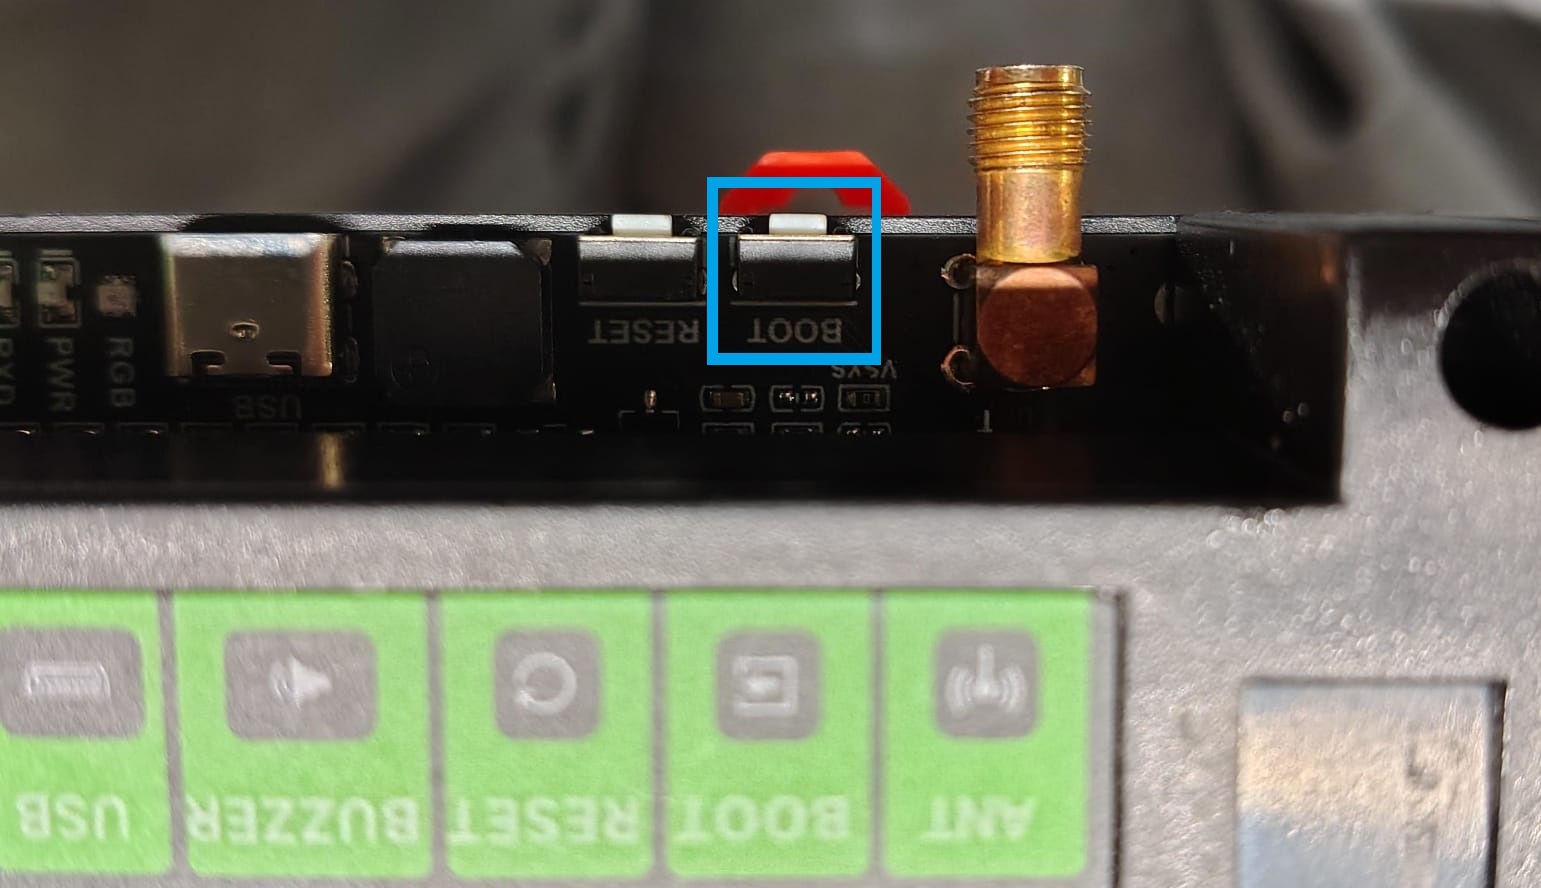
Before you begin, make sure the relay is connected to your computer
Step 1 — Add Relay Device in DoorVi
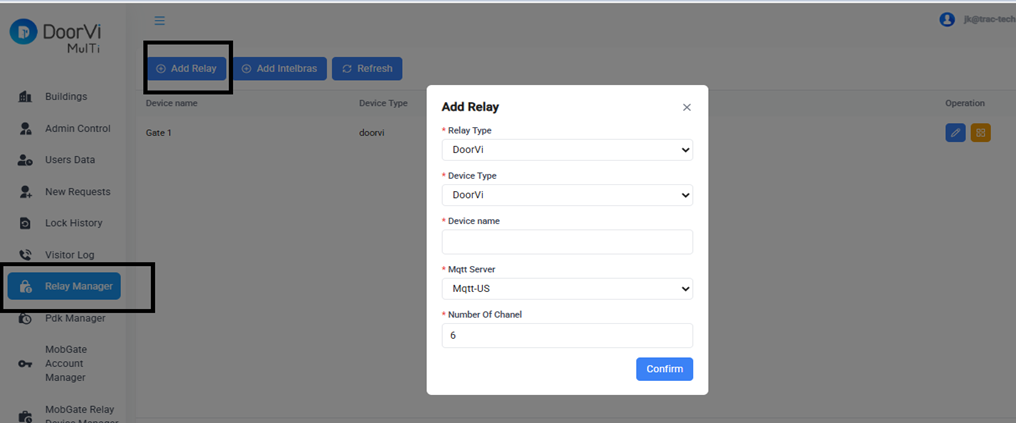
Register your relay in the DoorVi Multi Control Panel
Step 1b — Get MQTT Credentials
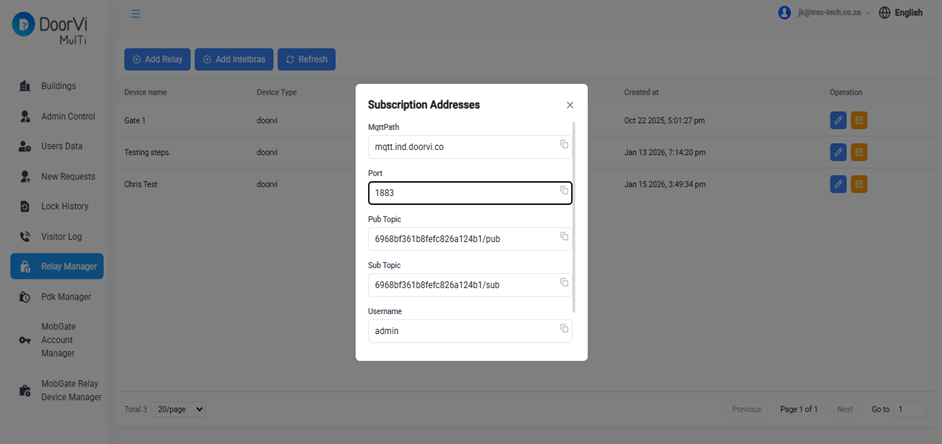
Copy MQTT details — you'll need them later during configuration
Step 2 — Download the Firmware (.bin)
Download the ESP32-S3 setup file to your computer
Step 3 — Open the ESP Flashing Tool
Connect your device via the browser-based ESP Tool
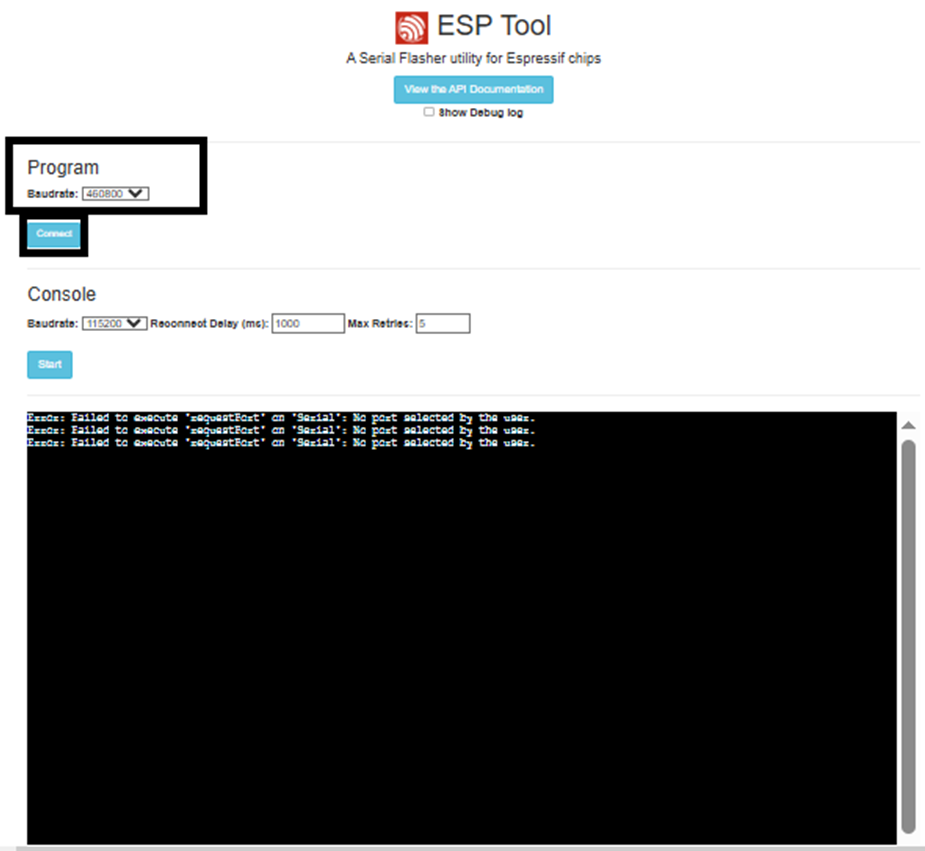
USB Serial Device (COM3), CH340 (COM5)ls /dev/tty.*/dev/tty.usbserial-xxxx or /dev/tty.SLAB_USBtoUARTStep 4 — Flash the Firmware
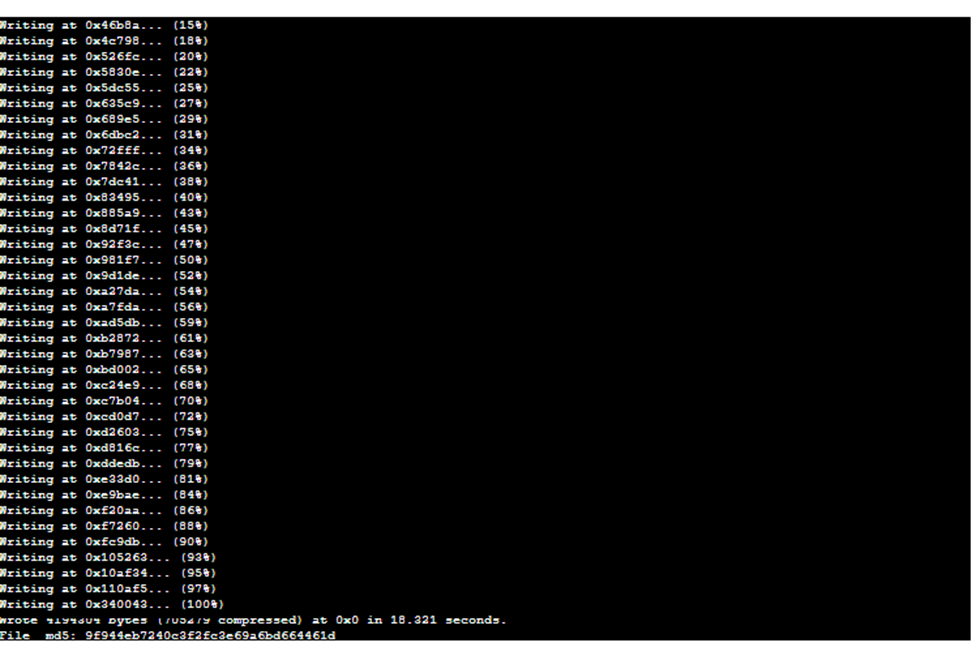
Erase flash memory and program the ESP32-S3 with the DoorVi firmware
0x1000 with 0x0.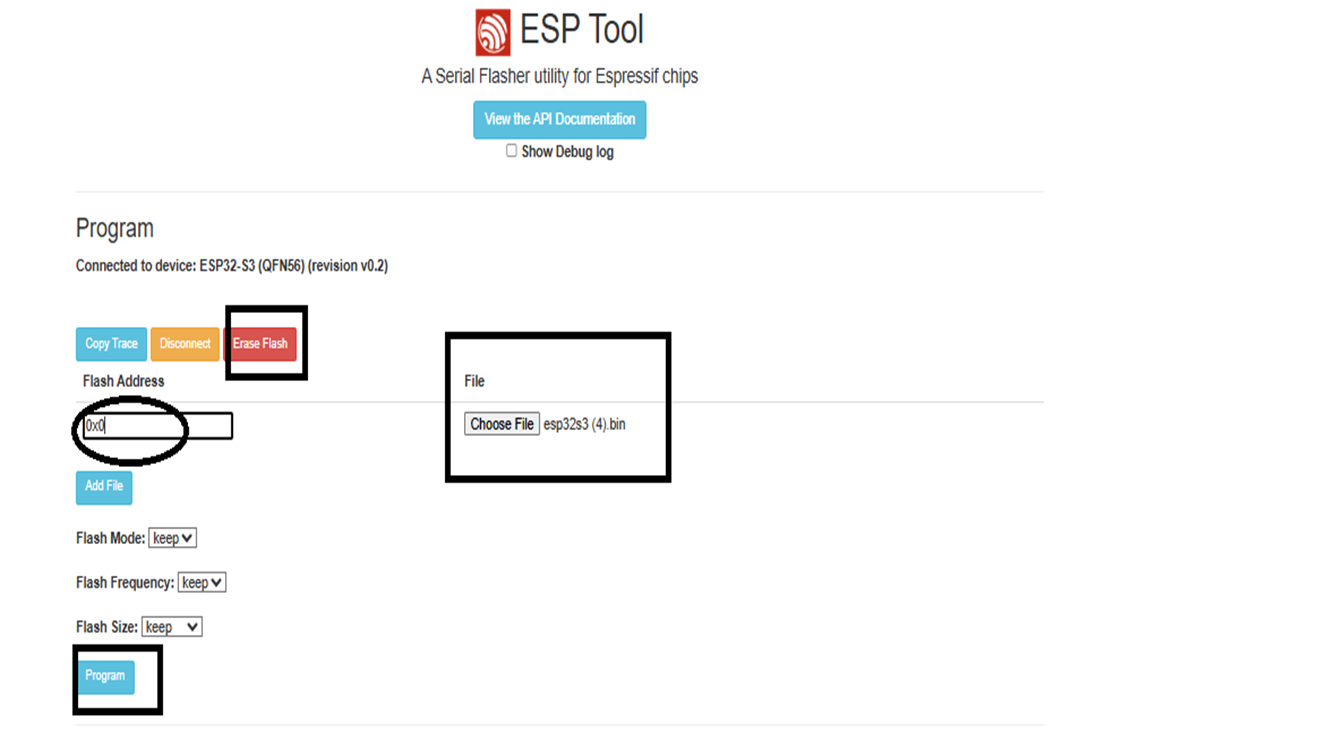
Step 5 — Connect to DoorVi Setup WiFi
Reconnect the device and join the DoorVi-setup WiFi network
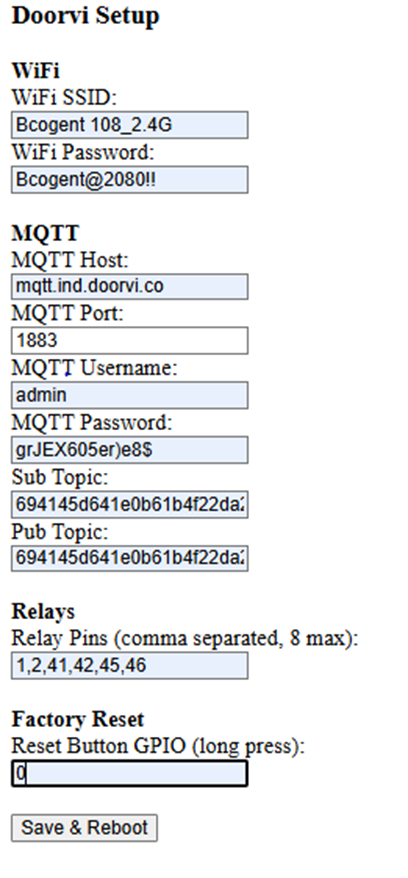
Step 6 — Configure WiFi & MQTT
Enter your WiFi and MQTT credentials in the DoorVi Setup page
192.168.4.1mqtt.ind.doorvi.co
mqtt.us.doorvi.co
mqtt:// or https:// prefix.
1883
admin
Copy from the DoorVi Control Panel (screen left open in Step 1b):
If your Wi-Fi network changes (for example, you change your internet provider or move the relay to a new location), you will need to reconnect the ESP32-S3 relay to the new Wi-Fi network.
You do not need to repeat the entire configuration process. Simply:
192.168.4.1."- Wi-Fi SSID — Enter the name of your new Wi-Fi network.
- Password — Enter the password for your new Wi-Fi network.
Please follow the entire setup guide starting from Step 1.
The Wi-Fi SSID and Password must exactly match your router's settings. Both fields are case-sensitive — uppercase and lowercase letters are treated differently.
- DoorViWiFi is not the same as doorviwifi
- MyOffice123 is not the same as myoffice123
A common reason for connection failure is entering the Wi-Fi name or password with incorrect capitalization. If the relay does not connect after saving the settings, carefully verify that both fields are entered exactly as they appear on your router.
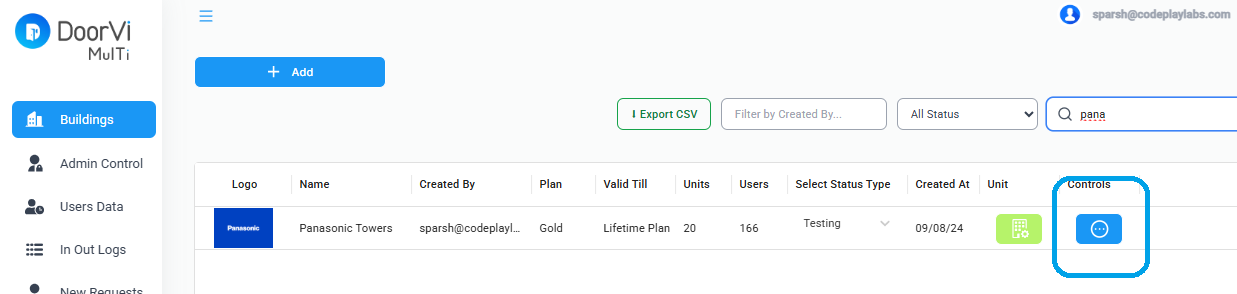
Step 7 — Add Relay Lock in DoorVi
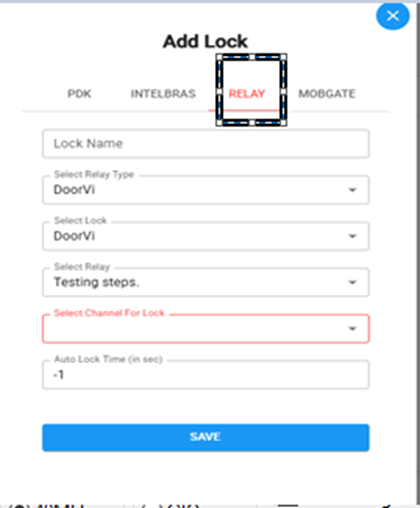
Link the relay to a building and configure the lock
- Relay device: channels are numbered Channel 1, Channel 2, Channel 3, and so on.
- Configuration screen: channels are numbered Channel 0, Channel 1, Channel 2, and so on.
Verify & Done
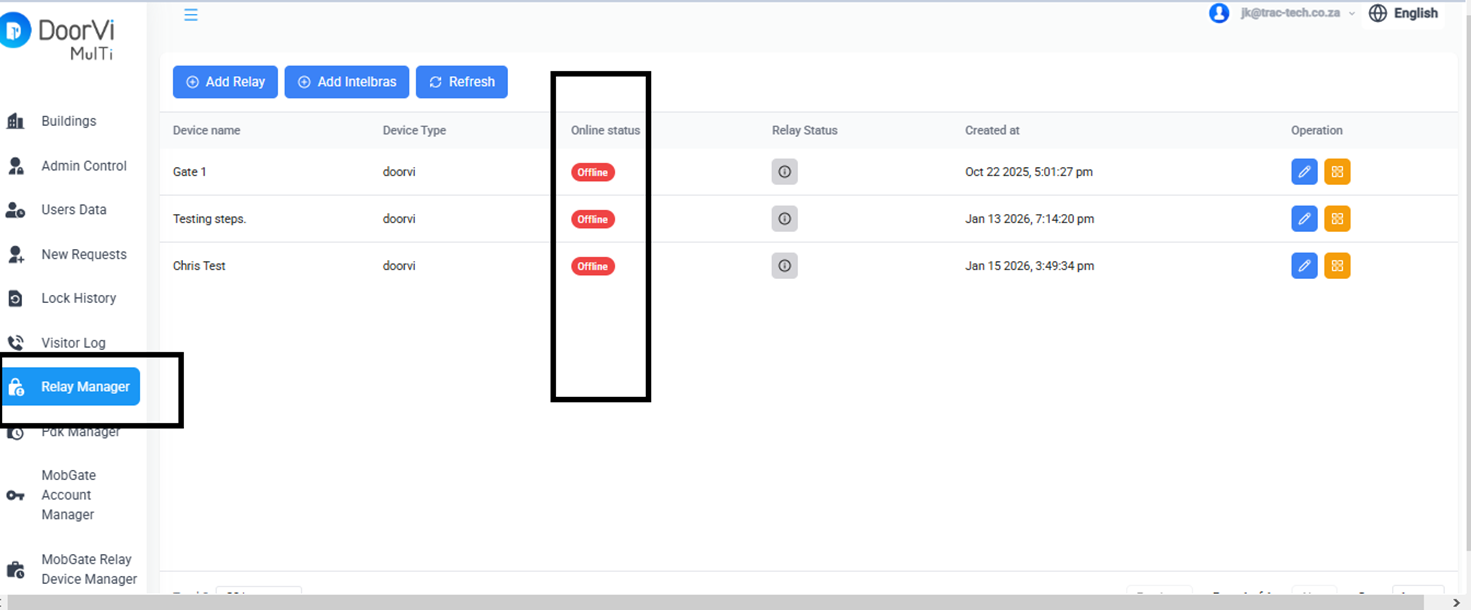
Check relay status and confirm the setup is complete